Saturday, July 16, 2016

No-Bake Neapolitan Cheesecake

Hey, hey, hey! I'm back to blogging!


Or at least I'm trying to :) I've been inactive for weeks because I have a lot in my plate: work, trips with friends, and money budgeting. Adulting is hard. No one told me that in college. -_-

But despite my battle with time and bills, I am enjoying it! What I do not enjoy, however, is how fast-paced our generation can be. Now, everyone wants everything in a snap. It's like everyone is expecting you to be on top at your early to mid 20s - and if you miss that time frame, it's too late to succeed. Who made that freakin' time frame??

And that affected my blogging. I started this food blog even without a formal background in cooking because I love and want to bake, to take photos, and to write. I was happy. I know my blog (still) isn't the prettiest, but at least I'm documenting (the best of) my baking adventures.

And then I learned that I can earn from blogging, because I saw that others can. And I was thinking, that this could be my way to succeed in life early! That I can earn a lot at home just by blogging. So I worked harder for better content and tried to expose my posts more - and then I let it consume me to the point that I forgot to have fun on the process. I got frustrated because I think that my growth is too slow, because I'm still not earning from this blog after my first post in December 2014. Baking is an expensive hobby, and I just keep on spending without anything in return. So unconsciously, I stopped.

But then the other day, someone talked to me about his passion for music. How he and his friend is willing to invest thousands of money (literally) in music, and then share it underground to real music enthusiasts with no money in return. Because earning from passion is just a bonus - the real return there is the fulfillment of doing what you love.


Right on the next day after that talk, I made this No-Bake Neapolitan Cheesecake. Because life is full of colors, and mixed with different flavors. It can be easy if you choose it to be (just like choosing baked vs no-bake), and needs to invest some time on (because baking in general needs time!). I am now writing this post with a refreshed outlook: that I am doing this because I love to bake, and I want others to spark their inner-baking diva as well! :) If I do earn from this in the future, then His will be done. But for now, I want to share my passion with fellow passionate bakers.

So I know that this has been a lengthy post already, and I have to get to the cake:

In the original recipe, it called for a 9" springform pan. I opted for 8", just because it is prettier in a photo. Seriously. So as a result, the supposedly 3rd layer of cheesecake - or the vanilla layer - became a layer of whipped cream. If I continued with another layer of cheesecake, this cake would've been a tower already! But at least I managed to do the aesthetic of a Neapolitan dessert - a chocolate, strawberry, and vanilla layer.

Ingredients
Graham Cracker Crust
  • 1 1/2 cups Graham Crackers, crushed
  • 1/4 cup Butter
Chocolate Cheesecake
  • 1 cup (8 oz) Cream Cheese, room temperature
  • 1/4 cup Sugar
  • 3/4 cup Bittersweet Chocolate, chopped
  • 2 tbsp Butter
  • 1 cup Whipped Cream
Strawberry Cheesecake
  • 1 cup (8 oz) Cream Cheese, room temperature
  • 1/4 cup Sugar
  • 1 tbsp Strawberry extract (I used McCormick)
  • 1 cup Whipped Cream
Vanilla Whipped Cream
  • 1 cup Whipped Cream
  • 1 tsp Vanilla extract
  • 1/4 cup Sugar* (optional)

Instructions
Prepare crust:
  1. Crush graham biscuits using a food processor, or place it in a ziplock back and press using a rolling pin until it turns into fine crumbs. 
  2. Melt butter, and mix into crushed grahams. 
  3. Press the mixture firmly on the bottom and sides of an 8" springform pan. 
Chocolate Cheesecake Layer:
  1. Melt chocolate in a microwave for 30 seconds. If lumps are still present, continue to heat it in 10 seconds intervals until it is smooth. Cool chocolate for 10 minutes. 
  2. In another bowl, whip cream cheese until light and fluffy. Slowly add in sugar, then continue beating until sugar is dissolved. Beat in melted chocolate. 
  3. Fold in whipped cream using a spatula.  
  4. Pour mixture on prepared springform pan. Place pan in the freezer.
Strawberry Cheesecake Layer:
  1. Whip cream cheese until light and fluffy. Slowly add in sugar, then continue beating until sugar is dissolved. Add in strawberry extract, then continue beating mixture until it is evenly distributed.
  2. Fold in whipped cream using a spatula.  
  3. Pour mixture on prepared springform pan as the second layer. Place pan in the freezer.
Vanilla Whipped Cream:
  1. Whip whipped cream on high for 5 minutes. Add vanilla extract. If desired, you may slowly beat in sugar. I opted not to because the brand of whipped cream I use is already sweet on its own.
  2. Pipe whipped cream on top of the strawberry layer. Or if you prefer a rustic look, drop a cup of whipped cream on top and spread freely using an icing spatula or spoon.  
Makes 1 8" cake.
Recipe adapted from iambaker.


Take a step back from your busy life, and give some time doing what you really love <3

Sunday, April 24, 2016

Chocolate Cherry Cake | Cherry Buttercream Recipe

There's usually no occasion when I bake anything. And when there is an occasion, I either run out of time or get lazy to bake anything!


Anything with cherries make the dessert fancy. So when I brought this over to my family's regular Sunday dinner at my grandparents' house, everyone kept asking what's the occasion. My cousin was the 3rd person to ask in less than 10 minutes, so I told her that it's for her wedding anniversary. She blushed and said thank you. You know, just keeping up with my joke.


When it was time to serve the cake, I learned that it was my cousin's wedding anniversary!!

I bring desserts in like 1 out of 4 Sundays a month (used to be more frequent before I got an office job) -- just lucky enough to bring it on the right day!


The real reason I made this cake was because my dad bought 3 jars of maraschino cherries, and they were about to expire. Very thoughtful, eh? :)) 

I've been meaning to make a cake for a long time already. I just keep on passing the idea because (1) I get lazy and (2) I don't have time! :( But if you know that an ingredient is about to expire, trust me, you make time for baking. 


And it's a tasty push! I was looking into making a black forest cake, but I don't have whipped cream. Yes, it's me again being completely lazy to go out and buy one. Then I got frustrated. Then I cried while looking at Pinterest photos of black forest cakes, thinking how close I was yet so far. I already made the chocolate cake layer!! But whipped cream. And laziness. :(

Then I used this little head of mine and thought of what can I substitute whipped cream with. I thought about making whipped buttercream, and it felt like that works! 

And since the opportunity was already there, why not make the most out of the 3 jars by making cherry buttercream instead?  


I love how natural this buttercream tastes. I usually use food flavoring to add a fruity taste on my frosting, but the maraschino cherry juice is a good flavoring agent!

Cherry Buttercream

Ingredients
  • 1 cup Butter (softened)
  • 6-7 cups Powdered Sugar
  • 1 tbsp Vanilla
  • 6 tbsp Maraschino Cherry juice (approximate)
  • Pinch of Salt

Instructions
  1. Using an electric mixer, whisk butter on medium-high until it lightens in color.
  2. Mix in vanilla and salt.
  3. Add in powdered sugar, one cup at a time. Mix on medium speed. Add a tablespoon of cherry juice in between cups of sugar to soften the frosting.
  4. Mix to desired consistency.
Frosts 1 8" cake with 2 layers.

Recipe adapted from Frost and Serve.

I added chopped cherries and mixed it to 1 cup of buttercream that I spread on the middle layer. I actually regret that I thought about this after baking the chocolate layer, but I could have mixed some chopped cherries on the batter before baking it for a more fruity surprise! Maybe you could try it for me and tell me how it goes? :)

Saturday, March 12, 2016

Devil's Oreo Cheesecake Cake Recipe

It's my dad's birthday!


For some reason, I find it hard to decide a flavor for a guy. While the safest option you could choose is chocolate cake, I hesitated at first because I already made a Devil's Food Cake for my dad once. To play it safe, I asked him for any requests. And guess what? It was still Devil's Food Cake!

I don't think I've shared it with you before, but I'm daddy's little princess. So I want the best cake for him on his birthday. I decided to an extra something on his birthday cake - an Oreo Cheesecake layer.


I've heard about how Cheesecake Cakes take extra time and effort to make. Well, it does. But it's actually worth it! I made the cheesecake layer the morning before, froze it the whole afternoon, baked the Devil's Food cake layers that evening, then arranged the cake that morning.


I haven't tried Cheesecake Cakes before. And boy, am I glad to try it now! The creamy texture of the cheesecake is a wonderful mix with that rich chocolate layer. This could stand alone even without a frosting, so hooray to naked cakes!


But everything is more fun with frosting, right?


Devil's Oreo Cheesecake Cake

Ingredients
  • 8 oz Cream Cheese (softened)
  • 9 pcs Oreos (chopped)
  • 1/2 cup + 2 cups Sugar
  • 2 pcs + 2 pcs Eggs
  • 1 3/4 cups Flour
  • 3/4 cups Cocoa Powder
  • 2 tsp Baking Soda
  • 1 tsp Baking Powder
  • 1 tsp Salt
  • 1 cup Buttermilk
  • 1/2 cup Oil (I use cooking oil)
  • 2 tsp Vanilla Extract
  • 1 cup Freshly Brewed Hot Coffee
Instructions
    For Oreo Cheesecake Layer:
  1. Cream together cream cheese and 1/2 cup sugar.
  2. Add eggs one at a time, beating well in between.
  3. Pour mixture into an 8" springform pan lined with parchment paper on bottom and sides. Cover the bottom and sides of the pan with aluminum foil, and place the pan on a roasting pan with boiling water.
  4. Bake for 25 to 30 minutes.Let the cake cool before removing in the oven to avoid cracks.
  5. Freeze overnight.

    For Devil's Food Cake Layer
    :
  1. Sift the flour, (2 cups) sugar, cocoa powder, baking soda, baking powder, and salt into a large bowl. Mix with a whisk until combined.
  2. In a medium bowl, combine buttermilk, oil, eggs, and vanilla.
  3. Fold in wet ingredients to dry.
  4. Pour in coffee and stir with a spatula until combined.
  5. Pour batter into preheated pans. Bake for 40 to 45 minutes. Cool in the pan for 30 mins.

    Assembling Cake
  1. Assemble the cake by leveling the Devil's Food cake layers first.
  2. Line a thin layer of frosting on the bottom layer before placing the cheesecake layer.
  3. Spread another thin layer of frosting on top of the cheesecake layer before placing top layer of cake.
  4. Frost the cake.
I give credit to where I get my recipes from; but this Devil's Food Cake has been on my recipe list for so long that I don't remember where I got it :( Credits to the real author!

I was freaked out at first that the cheesecake layer might be rock solid after I assemble everything. But just give it some time to thaw, and it will be fine! I didn't leave mine at room temperature - I placed the cake on the fridge until it was ready to serve. The cheesecake layer was creamy and heavenly!

Now, on to the frosting: back when I wrote the post for this 7 Minute Frosting, I liked how it tastes like Marshmallows and how it hardens after hours. I still like the frosting, but I was really aiming for a spiky effect, but this frosting won't hold it's shape 'cause it's still a bit runny. :( And while I like that the frosting hardens, be warned that this isn't good when the cake is already more than two days in the fridge. It hardens and just falls off when you cut it! I would really try to improve on this...

Saturday, February 13, 2016

Caramel Cheesecake Recipe

I think I have already established my love for cheesecake.


I was thinking of other flavors that reminds me of Valentines aside from red velvet. I think I have way too many red velvet posts for now, so let me add other flavors to my blog.

Chocolate came to my mind - but then again, it's a classic flavor. It can be a special cake like my moist cake, but I'm thinking of something more related to Valentines.


Then I remembered Caramel! I've always loved caramel-filled chocolates, so why not dedicate a whole cake to caramel?


But I don't want to it be super sweet. As much as I love chocolate + buttercream + caramel separately, putting them all together in one cake sounds like a toothache. So the sour taste of cheesecake contrasting to the sweet flavor of caramel sounds perfect.


I admit - this isn't the prettiest cake I've ever made. I used as little graham crust as I can get away with, and I didn't bake it in a water bath (which resulted to a cracked top). But taste wise? It's amazing!

Another confession: I (secretly) call this "poor-man's cheesecake". I didn't use sour cream or heavy whipping cream for this recipe, used as little graham crackers as I can, and used Kraft caramel candies. But in the end, it doesn't taste short on flavor! It's a perfect go-to cheesecake recipe.

Ingredients
For cheesecake and garnish:
  • 12 oz cream cheese
  • 1 1/2 cups light brown sugar
  • 1/2 cup Kraft caramel candies, diced into 4 parts/cube
  • 2 pcs eggs
  • approx. 1/4 cup melted caramel*
For crust:
  • 1/2 cup crushed graham crackers
  • 1/4 cup sugar
  • 1/3 cup butter

Instructions
  1. Preheat oven to 190C
  2. Prepare crust. Mix in crushed graham crackers, sugar, and butter. Press into the bottom of an 8" springform pan.
  3. Beat cream cheese until soft. Mix in sugar, and add eggs one at a time. Mixture should be runny.
  4. Pour mixture into crust. 
  5. Bake for 35 minutes, or until the top of the cake is golden and showing deep cracks. Cool for 2 hours.
  6. Refrigerate cake for 1 hour to overnight.
  7. Top with melted caramel. If you want to use candy caramels, simply melt 12 pcs of Kraft caramel candies in a double broiler, together with approximately 6 tsps of milk or water. You may add more liquid if you prefer it to be more runny.
Recipe adapted from WikiHow. 

Just like in my Peanut Butter Cheesecake, my brother had a comment about this cake. He said it's "too sweet". But when I tried it myself, the sweetness was just okay. I think there's something wrong with his taste buds!

Tell me what you think if you'll try this cake! ;)

Thursday, February 4, 2016

Red Velvet & Cheesecake Thumbprint Cookies

It’s the season of love! So what better way to celebrate it than red velvet desserts??


Okay, fine; I make red velvet any time of the year. (Actually, I have an addiction to Red Velvet. So I’m using Valentine’s season as an excuse to make more Red Velvet desserts. #RealTalk) But why limit this amazing dessert to Valentines or Christmas only? Let’s celebrate red velvet all year round!


But seriously, I think there’s something wrong with me: I tend to celebrate the most mondane days vs special occassions. Like Christmas. Here in the Philippines, the festive spirit starts as early as September. But all -ber months long, I wasn’t prepared for Christmas! I only felt the season kick in the day after Christmas. It sucks – getting to feel Christmas when it’s almost over. 

So this year, I made a silent vow to myself to get into the season early. And I’m not just talking about Christmas – it includes Valentines and Summer! Thus, it explains this early Valentines post. ;)


Why cookies? Because it’s easy! I’ve been busy lately with work. Who knew that the retail industry is a busy work place to be in after Christmas season? They should’ve warned me. Nevertheless, I still want to bake. I missed it after (unintentionally) being on hiatus over the season.

I love how these cookies are a bit more special than the classic cookies. I like how the cheesecake  “thumbprint” adds a contrast to the red velvet cookie which looks like a pretty crinkle covered in sanding sugar instead of the classic powdered sugar. Honestly, the cookie itself is a bit dry. I guess it’s because you’ll bake it for a total of 22 minutes (though in lower temp). But I actually like it because it almost resembles the texture of graham cracker crust on a cheesecake. So these technically tastes like bite-size cheesecake in red velvet cookie crust! H-E-A-V-E-N!


I must warn you: these are addictive! I rarely snack on the desserts I bake, but I was already snacking on these even before the 3rd batch were out of the oven! I already stored half away to prevent myself from eating everything. We’re talking about red velvet and cheesecake here, guys. #shameless

Ingredients:
Red Velvet Cookies

  • 1 cup butter (softened)
  • 1/2 cup brown sugar
  • 1 egg yolk
  • 1 tsp vanilla
  • 2 cups flour
  • 4 tsp red food coloring
  • 2 tsp cocoa powder
  • 1/2 cup granulated sugar (for rolling)
Cheesecake Filling
  • 1/2 cup (4 oz) cream cheese (softened)
  • 1 egg yolk
  • 1/4 cup sugar
  • 1/8 tsp salt
  • 1/4 tsp vanilla

Instructions
  1. Preheat oven to 150C. 
  2. Beat together butter, brown sugar, egg yolk, and vanilla until light and fluffy. Mix in flour, food coloring, and cocoa powder until well blended. Soft dough will form.
  3. Pour sugar in a flat plate. Scoop a teaspoon of the mixture and roll into sugar until well coated. Place in baking pan topped with silicon mat or parchment paper.Using a rounded 1 tsp measuring spoon, make a small well in the center. 
  4. Bake for 10 minutes.
  5. While baking, prepare the cheesecake filling by beating together cream cheese, egg yolk, sugar, salt, and vanilla until smooth. Transfer mixture in a piping bag snipped at the tip (or place a plain, round piping tip)
  6. Once cookies are done, redo the well to ensure it's still deep enough for the cheesecake filling. Pipe filling just until it's the same level with the cookie.
  7. Bake for an additional 12 minutes, until filling is set.
Recipe from Something Swanky.


Notes for success:
In the original recipe, it says that you can use the extra egg whites to use as egg wash instead of rolling the cookies on sugar. I actually prefer the extra texture (and slight sweetness) the sanding sugar brings!

Sunday, January 17, 2016

Chocolate Mousse Cake Recipe

I am finally back!

I know I haven't written in a while, especially through the time of the year where food bloggers go crazy over Christmas-themed recipes. Well, I failed on that point.

I recently started working in an office, and I didn't expect that it will consume a lot of my time. But I still bake almost every other night but it leaves me no time to take photos, to edit it, to make a write up, and to research more recipes. And seriously, I miss it! Not a week passed without me itching to make a post. But aside from time-constraints, my internet connection has been failing me miserably. :( #firstworldproblems


Anywoo, let's kick off the year with something easy to do, yet very sophisticated -- chocolate mousse cake! There's this dense, moist chocolate cake on the bottom layer (which is honestly delicious by itself), the amazingly soft, creamy, and rich chocolate mouse middle layer, and the unmistakable whipped cream layer on top! Layers of chocolate goodness wrapped in one cake!


What inspired me to do this cake is the famous chocolate mousse cake from a local bakeshop. Chocolate mousse quite popular here. It's even bundled as the Christmas cake for a KFC bucket meal! And I thought, I have made a red velvet mousse cake before, why not make the classic chocolate version?

When I was starting to learn how to bake, almost all my creations were "too" sweet. Well for me, the definition of "sweet" is subjective - like it may be just right for me, tooth-aching sweet for some, and a little bland for the others. I tend to cut down the sweetness anyway since my family ain't a big fan of it. But in this cake, I think my family and I finally agreed that this is the perfect level of sweetness!


This cake may seem time consuming, but it's actually just like building a regular cake - if not faster. Treat the chocolate mousse like frosting; make it while the chocolate cake is baking. This has been my go-to cake recently (not to mention our Christmas cake as well) because it cuts down the decorating time. All you have to do is prepare layers, pour chocolate mousse after cake is cooled, spread whipped cream after chocolate mousse has been refrigerated for a while, and sprinkle chocolate jimmies (or chips, whatever you prefer!).


Ingredients (for chocolate mousse layer)
1 tbsp cocoa powder
2 1/2 tbsp hot water
3.5 oz. bittersweet chocolate, chopped
3/4 cups cold heavy whipping cream
*1/2 tbsp granulated sugar*

(Whipped cream layer)
1 cup heavy whipping cream
*1/4 cup granulated sugar*

Instructions
  1. Bake chocolate cake in an 8" springform pan. Use only 1/3 of the quantity of the ingredients, or use the remaining batter for cupcakes or another cake. Set aside and let it cool.
  2. Dissolve cocoa powder with hot water in a small bowl, set aside.
  3. Whip the heavy whipping cream using a mixer in medium speed until it begins to thicken, approximately half a minute. Then, increase the speed to medium-high to high and whip until soft peaks form. This will take another 15-60 seconds.
  4. Using a microwave safe bowl, melt the finely chopped chocolate for 20 seconds. Stir the chocolate until it becomes creamy. If it isn't completely melted yet, return to microwave and heat in 10 second intervals until it is completely creamy when stirred. Let cool for around 2-5 minutes. 
  5. Whisk cocoa powder mixture into melted chocolate. Fold in the chocolate mixture to whipped cream, being gentle enough not to deflate the cream.
  6. Pour the chocolate mousse over the cooled chocolate cake base layer (still in the pan), then refrigerate for 30 minutes-1 hour. 
  7. Whip the cold heavy whipping cream in medium-high for 1 minute, until the cream doubles in volume. 
  8. Simply pour the whipped cream over the cake (still in the pan), or take out the chocolate cake-chocolate mousse layers out of the springform pan first before piping the cream in tall curled dollops (like what I did in the photo). Or pour out a thin layer of the whipping cream before piping all the cream. 
Makes one 8" cake. 
Recipe adapted from Brown Eyed Baker.


Notes for success
  • The amount of sugar you'll use for the chocolate mousse and whipping cream depends on the sweetness of your chosen brand, so play around with sugar by adding little by little until you get your desired taste. The brand I use is already sweet by itself, so I omit the sugar.
  • To get a cleaner cut between layers (unlike mine), level your cake first. Then, make sure to level the choco mousse layer as well. When pulling it out the pan, blow dry the sides of the pan two to three times just to let the outer layer pull away from the pan. Slowly pull out the springform pan.

Sunday, October 25, 2015

Reese Peanut Butter Cheesecake Recipe

If you're a Peanut Butter junkie, this cheesecake is perfect for you!


For the past month(s), I have been inactive for 3 reason: (1) because my cousin from Canada came to the Philippines to visit, (2) because I started driving lessons, and (3) because I started working in an office! I'd like to share more about #2 and #3 on a different post, so let me tell you more about my cousin: she stayed in my house for the whole month and we were busy catching up for the 7 years we were apart. I discovered something that we couldn't discuss over the phone -- that she loves peanut butter!


I was able to make a peanut butter chocolate cake for her, but there were some left over Reese peanut butter cups after she left. Also, some cream cheese because of the cream cheese frosting that I made for the that cake. Then I remembered how I made that Oreo Cheesecake and never actually got a chance to taste it myself... So why not make a Reese Peanut Butter Cheesecake for myself??

And when I said "for myself", I actually meant it! I have some 6-inch aluminum cheesecake pan with a removable bottom. I tried using it on sponge cakes before when I'm making a 3-tier cake, but other than that, I don't use this pan. So why not make the most out of it?


This size is just perfect for one person, or giving it as a gift. But being generous as I am, I still shared some to my family. ;) But let me tell you - it barely lasted 24 hours! Not just of the serving size, but because it actually tastes good!

Ingredients
For Crust
80g (1 cup) Peanut Butter cookie sandwiches (If these aren't available in your area, use Oreos instead)
1 tbsp butter (melted)
1 tbsp sugar
For Cheesecake
8oz (1 package) cream cheese
1/4 cup Sugar
1/2 tsp Vanilla
1pc egg
5pcs Reese Peanut Butter Cups
For Peanut Butter Ganache and Garnishing*
1/3 cup Reese peanut butter chips
1/6 cup heavy whipping cream
1pc Reese Peanut Butter Cups (chopped)

Instructions
  1. Preheat oven to 175C.
Making the Crust:
  1. Place Peanut Butter flavored cookie sandwiches in a food processor. Pulse until the cookies are in fine crumbs. If you don't have a food processor, place the cookies in a resealable bag and use a rolling pin or glass bottle to crush the cookies into fine crumbs.
  2. Mix melted butter into cookie crumbs. Once it's mixed thoroughly, pack the crumbs on the bottom of a 6" springform pan.  
Making the Cheesecake:
  1. Beat cream cheese until smooth. Add in sugar and vanilla. When the mixture is well blended, beat in eggs one at a time.
  2. Place Reese Peanut Butter Cups on top of the prepared crust. Line this the way you wish - you may create a circle inside the pan to make sure that it is distributed evenly on every slice, or stack it all in the center to put the "surprise" in the middle part of the cake.
  3. Pour batter carefully into the crust, making sure not to move the previously arranged Peanut Butter cups.
  4. Bake for 45 minutes. After baking, open the oven door by a little bit and let the cake cool inside for around 30 minutes. Afterwards, refrigerate for 3 hours or overnight.
Garnishing the Cake:
  1. Prepare the Peanut Butter Ganache (or whipped cream, if desired). To do so, heat heavy whipping cream. Add it to the peanut butter chips and mix thoroughly until no more lumps are present. Let it cool to room temperature.
  2. Remove the cheesecake from the fridge and pour the peanut butter ganache on it.
  3. Chop each remaining Reese Peanut Butter Cups into quarters. Sprinkle on top of the cheesecake.
Makes one 6" cheesecake.


Now I am proud of this recipe because it is the first time I played around and made my own! If there are any similarities to other recipes online, then it is just a coincidence. When I was making this, I was only using my Oreo Cheesecake recipe as basis.

*My brother commented that the peanut butter taste is a bit overwhelming. If you wish, you may opt to switch the peanut butter ganache to whipped cream instead.

Monday, October 12, 2015

Red Velvet Crinkles Sandwich with Cream Cheese Frosting Recipe

Well, that title was a mouthful.


And so are these crinkle sandwiches!

Back in college, I discovered these sweet treats when my org started selling these as one of our fund raising activities. Although I want to support my org, it's really against my will to buy myself a tub of crinkles when I can make one myself. :(


I have attempted making these for lots of occasions. Okay, fine - just one. The rest are just because I want to eat 'em. I made these during my friend Shin's 13th birthday (yes, I have friends that young!) and they loved it! But the filling I used then was my regular cream cheese frosting recipe. Although this frosting is good on cakes and cupcakes, I find it too creamy for the sandwich filling. So I decided to modify it a bit to make it maintain its shape, but is still not uber sweet :)


What I like about this recipe is that the crinkles itself is puffy and cakey, but not dry. I have tried making these crinkles before making a classic chocolate crinkle, and every attempt I made on the latter is flat. :( I'm still on my journey on finding the perfect chocolate crinkle recipe, but these red velvet crinkles are my go-to!


You know, these crinkles can do perfectly well on it's own. It already tastes delicious as it is!


But you know how frosting makes everything better, right?


Red Velvet Crinkle Cream Cheese Sandwich
Ingredients
2 1/4 cups flour
1/3 cup cocoa powder
1 1/2 tsp baking powder
1/4 tsp salt
1/2 cup butter, softened
2oz (or 1/4 cup) cream cheese, softened
1 1/2 cups sugar
2pcs eggs
1 tsp vanilla
2 tsp red food coloring
1/2 cup powdered sugar

Instructions
  • Place flour, cocoa powder, baking powder, and salt into a medium mixing bowl.
  • Mix butter, and cream cheese in a large mixing bowl. Add sugar and cream for about 1 to 2 minutes. Add eggs, red food coloring, and vanilla. Mix well.
  • Add dry mixture in two batches and mix well.
  • Refrigerate cookie dough for 4 hours.
  • Heat oven to 175C.
  • Scoop about 1 tsp of mixture and roll into balls. Roll it in powdered sugar, making sure to cover everything.
  • Bake for around 9 to 10 minutes.
Makes approx. 30 cookies
Recipe adapted from thelittlekitchen.

Cream Cheese frosting
Ingredients
4 oz cream cheese, softened
1/4 cup butter, softened
1 tsp vanilla extract
3 cup powdered sugar

Instructions
  • Cream together room temperature cream cheese and butter.
  • Add in vanilla. Stir until no more streaks of vanilla are seen.
  • Add powdered sugar one cup at a time, making sure to mix it in completely before adding the next cup.

You know about my red velvet addiction, right? Well, if not, check out my other red velvet recipes:

Red Velvet Cupcakes
Red Velvet Cake 
Red Velvet Mousse Cake

Wednesday, September 16, 2015

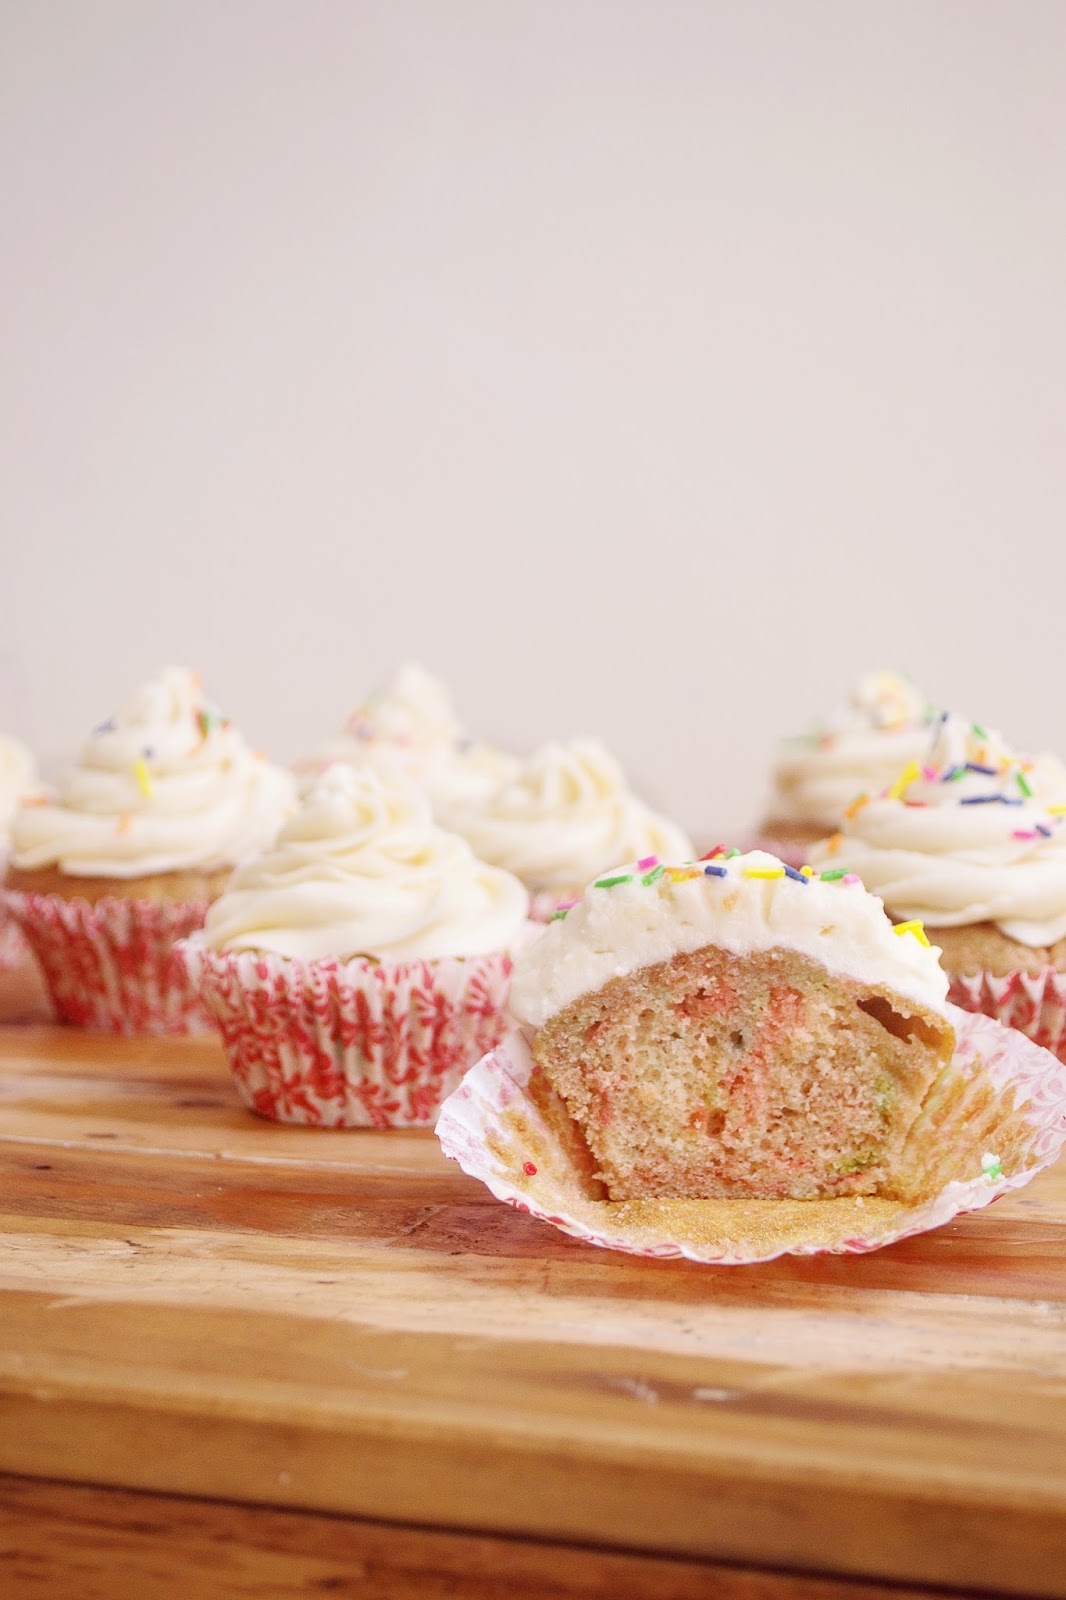
Funfetti Cupcakes | Vanilla Buttercream Recipe

It all started with a boxed cake mix.


WAIT! Before you close this window after reading the seemingly-banned-words ("boxed cake mix") in food/baking blogs, let me explain myself: yes, it did start with that, but it was because I saw them on sale! I rarely see cake mixes on sale - especially for more than half the price - so I took a box without even thinking of what to make.

Going back... I have been wanting to make a post about Vanilla Buttercream (or simple buttercream) for quite some time now. Since Vanilla Buttercream is very versatile, it was pretty hard to choose just one dessert to use it on. It could be used on any flavor of cakes and cupcakes - even on cookies! But I recently saw this tutorial by Zoella, and it reminded me of how much I want to make Funfetti cupcakes! Although she shared her own recipe, I already had my favorite vanilla buttercream so I didn't try her version. Sorry, Zoe. :( But I still love you <3


Recalling that I have a recently purchased boxed cake mix, I focused on the buttercream. Not having an electric mixer makes me feel lazy to make one... Let's just say my arm muscles get mad at me after whipping up just one batch of this. But I can't help it - buttercream still rules! So I end up whipping this while watching TV to distract myself from the soreness. LOL. Not having a mixer means making an extra effort to incorporate that sugar with butter. But I am a living proof that it could be done! :)

I have this thing for quick and easy - and these cupcakes are exactly that even without a boxed cake mix. Simply make a vanilla cupcake*, mix in sprinkles before baking, whip up vanilla buttercream, then add more sprinkles! But since sprinkles make anything better, I added a half cup of it into the batter even if it already had sprinkles pre-mixed in it. Or maybe I added another cup more... :>


I love how easy it is to pipe, and that it holds its shape very well. I was able to serve 80 vanilla frosted cupcakes in a party, and it all retained its shape after 5 hours!

This simple buttercream is fluffy, easy to whip (well, if you have a mixer!), and can be paired with almost anything! It can be served on any occasion as well.


And speaking of occasion ~ after I made these cupcakes, I remembered that my goddaughter's birthday was coming up. These then became the perfect celebration cupcakes/gift! Does this make me a good godparent despite my forgetfulness? I think it does. BUTTERCREAM RULES.
*As for my version of vanilla cupcakes, I'm still experimenting on getting that perfect cupcake, so please stay tuned for that! ;)


Vanilla Buttercream
Yield: Frosts around 30 cupcakes, or crumb coats an 8"-9" cake with two layers
Ingredients
  • 1 cup Butter (softened)
  • 7 cups Powdered Sugar
  • 1 tbsp Vanilla
  • 6 tbsp Milk (approximate)
  • pinch of salt
Directions
  1. Cream room temperature butter in a large bowl.
  2. Mix in vanilla and salt.
  3. Add in powdered sugar one cup at a time. Keep on mixing until sugar is dissolved. Add a tbsp of milk (or water) whenever mixture becomes hard to mix.
  4. Mix to desired consistency.
Recipe adapted from iambaker.

Just a warning: this is sweet. Very sweet. You could decrease the powdered sugar by a cup or two, but make sure to taste it because the butter might become dominant. Also, it might become too soft that it won't hold its shape. 

Monday, August 10, 2015

Sunflower Cupcakes | Chocolate Cupcake Recipe

I finished college!


So I know that that is a weird intro for a tutorial about Sunflower Cupcakes. What would have been better was "It's still summer!" or "Here's something to brighten up your mornings - ". Well, I could have said that but I really made these as my graduation cupcakes :)


If you have read the "about me" page of this blog, you know that I am studying at the University of the Philippines. UP has this tradition of planting sunflowers during summer season (which is March-May for the Philippines), which symbolizes our graduation (I think it's a very pretty tradition, but don't ask me why because I can't answer that). This year is different, because they started planting around May, since we had our academic calendar shift. What used to be an April graduation moved to June.

Since March, I was already thinking of how to make these cupcakes. My biggest dilemma was the flavor of the base cupcakes. Then I thought, why not make simple, flavorful chocolate cupcakes? Yeahhh, that sounds nice. It would be a nice contrast to the bright yellow frosting!


Chocolate Cupcake

Prep time: 10 mins
Cook time: 20 mins
Total time: 30 mins
Yield: Approx. 15 cupcakes
Ingredients:
  • 1 1/3 cups Flour
  • 1/4 tsp Baking Soda
  • 2 tsps Baking Powder
  • 3/4 cup Cocoa Powder
  • 1/8 tsp Salt
  • 1/4 cup Butter (softened)
  • 1 1/2 cups Sugar
  • 2 Eggs
  • 3/4 tsp Vanilla Extract
  • 1 cup Milk
Cooking Directions
  1. Preheat oven to 175C. Line cupcake pan.
  2. Sift together the flour, baking powder, baking soda, cocoa, and salt. Set aside.
  3. In a large bowl, cream together the butter and sugar until light and fluffy. Add the eggs one at a time. Stir in vanilla.
  4. Add the flour mixture alternatively with milk.
  5. Spoon 1.5 tbsps of the mixture into each cupcake liner. Bake for 15 to 20 minutes in the preheated oven.
Recipe adapted from WikiHow - sorry can't find the link anymore :(


For the Sunflower effect, I used the Wilton tip #70 which is a grass tip.
Simply pipe the petals as you would on a normal leaf. Start from the outside circle at a 160 angle (slightly angled), working your way to the inside. Make sure not to pipe it too long that it'll drop at the sides, and don't apply too much pressure. Once you've almost covered the whole thing (the center should still be a little bare), sprinkle some chocolate chips on it. Make sure the chips are on the inner circle only.

Even though my graduation was 2 months ago, I'm still posting this because it's still summer in other parts of the world! Take Canada, for example, where my cousin (Hi Colleen!) lives. Luckily, she was able to come home here during my graduation because it was her summer vacation! She also helped me in designing these cupcakes ;)

I hope these cupcakes will brighten your day no matter what the weather or the occasion is! <3
Monday, June 15, 2015

Oreo Cheesecake Recipe

Let's be honest here: who doesn't like Oreo?


Actually, don't answer. That's rhetorical because a normal person loves them!

Now Cheesecake, on the other hand, may be quite sketchy. Some don't like it because of its sourness and the unconventional taste compared to your normal moist chocolate cake. I actually wasn't familiar with cheesecake until around late High School. It's pretty expensive so I didn't get to taste it on a regular basis back then. But when I started baking, my love for cheesecake developed. It's a diversion from my usual sweet desserts, yet it fulfills my dessert cravings.

But a little sweetness would not hurt. So why not combine this classic cheesecake with Oreos? And to make things more exciting, I added whipped cream. That tall swirl of whipped cream is another thing to look forward to!


This dessert may be sophisticated, but it's actually easy to make. The ingredients are also easy to find! There are versions of cheesecakes that use sour cream, but this one does not.

Ingredients
1 package (24 cookies) Oreo cookies (divided), plus more for garnishing
1/4 cup butter (melted)
24oz (3 packages) cream cheese
3/4 cup sugar
1 tsp vanilla
3 eggs
1 to 1 1/2 cups heavy whipping cream

Instructions

  1. Preheat oven to 175C.
  2. Place 16 whole Oreo cookies (includes the cookie filling) in a food processor. Pulse until the cookies are in fine crumbs. If you don't have a food processor, place the cookies in a resealable bag and use a rolling pin or glass bottle to crush the cookies into fine crumbs.
  3. Mix melted butter into the finely crushed cookies. Once it is thoroughly mixed together, press the mixture firmly on the bottom of a springform pan using a spoon or your hands.
  4. Beat cream cheese until smooth. Add in sugar and vanilla. When the mixture is well blended, beat in eggs one at a time. 
  5. Chop the remaining 8 Oreo cookies. This does not need to be neat, but do not overdo it. Fold it in the batter. You may add more cookies if you desire.
  6. Pour the batter on the prepared crust. Bake for 45 minutes. After baking, open the oven door by a little bit and let the cake cool inside for around 30 minutes. Afterwards, refrigerate for 3 hours or overnight.
  7. Prepare whipping cream by whipping it for around 5 minutes, or until it has doubled in quantity. Garnish according to how you want your cake to look like.
Makes one 9" cake.
Recipe adapted from allrecipes.


Play around with the flavor of Oreo cookies you'll use. I used strawberry filling for garnishing the cake. Why not try to use the Birthday Oreos next time? Or even mint Oreos! The possibilities are endless. ;)

Saturday, May 23, 2015

Red Velvet Mousse Cake Recipe

Have I told you about my addiction to red velvet?


Lately, I have been dreaming of making more challenging cakes. It's not that making perfect cake layers and smooth & even frosting isn't hard, but I just want to try something a little bit out of the usual. I recalled a chocolate mousse cake. Who can ever forget that rich chocolate cake layered with smooth chocolate mousse and light whipped cream?  But my addiction for making everything red velvet kicked in - so why not make a red velvet mousse cake?


This cake is composed of a red velvet cake bottom, red velvet mousse for the center, and whipped cream for the top layer. The varying texture per layer makes magic in your mouth. This takes more time to prepare, but it. is. worth it. The extra labor makes it more challenging yet more special! Go creative in adding the whipped cream: you could either pipe in the frosting like I did, or simply pour it evenly on the cake. Garnish with chocolate chips, grated chocolate, or even red sprinkles! This part is totally up to you.


(Red Velvet Cake assembly)
For the base cake, I halved this red velvet cake recipe and used an 8 inch springform pan. While the cake is in the oven, prepare the red velvet mousse (instructions below). When the cake is done, remove it from the pan and let it cool in a cooling rack. After 10 minutes or so, return the cake on the same pan, and then pour the red velvet mousse over it. This ensures that the circumference of the mousse is even and won't spill over the sides of the bottom layer.

After assembling these two layers, place it in the fridge for an hour to make sure that the mousse is set. Before removing the cake from the fridge, prepare the whipped cream. The amount of whipped cream depends on you, but I like to use 1 to 1.5 cups of heavy whipping cream. You can't have too much whipped cream anyway, right? Using an electric mixer (or a really strong arm), whip the cream for around 5 minutes, until stiff peaks form and it has doubled in volume.

Push the bottom part of the springform pan to remove the cake and prepare it for frosting. Pipe the frosting the way you desire. If you opt to spread the whip cream instead, I suggest to do this before removing the cake from the springform pan.

Garnish with your favorite topping: may it be chocolate chips, red sprinkles, chocolate sprinkles, grated chocolate, or more!

Ingredients (Red Velvet Mousse)
2 oz. bittersweet chocolate, chopped
1 1/8 cups heavy whipping cream, divided
1/2 tbsp red food coloring
1/2 tbsp vanilla
1/8 cup granulated sugar*

Instructions (Red Velvet Mousse) 

  1. Melt the chocolate on a double broiler or on the microwave. Make sure to watch over this and not let it scorch! Stir it to ensure that there are no more lumps and that it is smooth.
  2. Remove from heat, then add in 1/8 of the heavy cream and stir until it is smooth.
  3. Add red food color and vanilla. Let it stand for around 10 minutes to cool it slightly.
  4. While letting it cool, whip the remaining cup of cream and sugar in another bowl until stiff peaks form.
  5. Fold in half of the chocolate mixture to the cream. Add the remaining chocolate mixture afterwards.
  6. See the instructions above on how to assemble into a red velvet mousse cake.
Makes one 8" layer (enough for one red velvet mousse cake)
Recipe adapted from iambaker.

Notes and Tips for Success:
* The amount of sugar depends on you. If your whipping cream needs some sweetening, add according to your preference. The brand I used was sweet on its own, so I didn't bother to add sugar.
* Double the recipe if you plan to make small batches (aside from the cake) to be put in small container cups or jars (just like the photo below!)
* Make sure to use Springform pan to ensure that the layers are clean on the sides.


NO REGRETS. This is my most favorite cake (so far)! The only problem here is that it can't be left for long on room temperature. That is, if there will be slices left after you serve it. I know mine didn't. *smirks* But this is a challenge when transferring it to other places or giving away as gift. But there's a solution here: put it in a mason jar! Simply mash the left-over cake (the scraps after leveling the bottom layer), pack it at the bottom of the jar, layer with red velvet mousse, pipe whipped cream, and garnish. I also placed it on small container cups, but it was long gone before I took photos.