Sunday, October 25, 2015

Reese Peanut Butter Cheesecake Recipe

If you're a Peanut Butter junkie, this cheesecake is perfect for you!


For the past month(s), I have been inactive for 3 reason: (1) because my cousin from Canada came to the Philippines to visit, (2) because I started driving lessons, and (3) because I started working in an office! I'd like to share more about #2 and #3 on a different post, so let me tell you more about my cousin: she stayed in my house for the whole month and we were busy catching up for the 7 years we were apart. I discovered something that we couldn't discuss over the phone -- that she loves peanut butter!


I was able to make a peanut butter chocolate cake for her, but there were some left over Reese peanut butter cups after she left. Also, some cream cheese because of the cream cheese frosting that I made for the that cake. Then I remembered how I made that Oreo Cheesecake and never actually got a chance to taste it myself... So why not make a Reese Peanut Butter Cheesecake for myself??

And when I said "for myself", I actually meant it! I have some 6-inch aluminum cheesecake pan with a removable bottom. I tried using it on sponge cakes before when I'm making a 3-tier cake, but other than that, I don't use this pan. So why not make the most out of it?


This size is just perfect for one person, or giving it as a gift. But being generous as I am, I still shared some to my family. ;) But let me tell you - it barely lasted 24 hours! Not just of the serving size, but because it actually tastes good!

Ingredients
For Crust
80g (1 cup) Peanut Butter cookie sandwiches (If these aren't available in your area, use Oreos instead)
1 tbsp butter (melted)
1 tbsp sugar
For Cheesecake
8oz (1 package) cream cheese
1/4 cup Sugar
1/2 tsp Vanilla
1pc egg
5pcs Reese Peanut Butter Cups
For Peanut Butter Ganache and Garnishing*
1/3 cup Reese peanut butter chips
1/6 cup heavy whipping cream
1pc Reese Peanut Butter Cups (chopped)

Instructions
  1. Preheat oven to 175C.
Making the Crust:
  1. Place Peanut Butter flavored cookie sandwiches in a food processor. Pulse until the cookies are in fine crumbs. If you don't have a food processor, place the cookies in a resealable bag and use a rolling pin or glass bottle to crush the cookies into fine crumbs.
  2. Mix melted butter into cookie crumbs. Once it's mixed thoroughly, pack the crumbs on the bottom of a 6" springform pan.  
Making the Cheesecake:
  1. Beat cream cheese until smooth. Add in sugar and vanilla. When the mixture is well blended, beat in eggs one at a time.
  2. Place Reese Peanut Butter Cups on top of the prepared crust. Line this the way you wish - you may create a circle inside the pan to make sure that it is distributed evenly on every slice, or stack it all in the center to put the "surprise" in the middle part of the cake.
  3. Pour batter carefully into the crust, making sure not to move the previously arranged Peanut Butter cups.
  4. Bake for 45 minutes. After baking, open the oven door by a little bit and let the cake cool inside for around 30 minutes. Afterwards, refrigerate for 3 hours or overnight.
Garnishing the Cake:
  1. Prepare the Peanut Butter Ganache (or whipped cream, if desired). To do so, heat heavy whipping cream. Add it to the peanut butter chips and mix thoroughly until no more lumps are present. Let it cool to room temperature.
  2. Remove the cheesecake from the fridge and pour the peanut butter ganache on it.
  3. Chop each remaining Reese Peanut Butter Cups into quarters. Sprinkle on top of the cheesecake.
Makes one 6" cheesecake.


Now I am proud of this recipe because it is the first time I played around and made my own! If there are any similarities to other recipes online, then it is just a coincidence. When I was making this, I was only using my Oreo Cheesecake recipe as basis.

*My brother commented that the peanut butter taste is a bit overwhelming. If you wish, you may opt to switch the peanut butter ganache to whipped cream instead.

Monday, October 12, 2015

Red Velvet Crinkles Sandwich with Cream Cheese Frosting Recipe

Well, that title was a mouthful.


And so are these crinkle sandwiches!

Back in college, I discovered these sweet treats when my org started selling these as one of our fund raising activities. Although I want to support my org, it's really against my will to buy myself a tub of crinkles when I can make one myself. :(


I have attempted making these for lots of occasions. Okay, fine - just one. The rest are just because I want to eat 'em. I made these during my friend Shin's 13th birthday (yes, I have friends that young!) and they loved it! But the filling I used then was my regular cream cheese frosting recipe. Although this frosting is good on cakes and cupcakes, I find it too creamy for the sandwich filling. So I decided to modify it a bit to make it maintain its shape, but is still not uber sweet :)


What I like about this recipe is that the crinkles itself is puffy and cakey, but not dry. I have tried making these crinkles before making a classic chocolate crinkle, and every attempt I made on the latter is flat. :( I'm still on my journey on finding the perfect chocolate crinkle recipe, but these red velvet crinkles are my go-to!


You know, these crinkles can do perfectly well on it's own. It already tastes delicious as it is!


But you know how frosting makes everything better, right?


Red Velvet Crinkle Cream Cheese Sandwich
Ingredients
2 1/4 cups flour
1/3 cup cocoa powder
1 1/2 tsp baking powder
1/4 tsp salt
1/2 cup butter, softened
2oz (or 1/4 cup) cream cheese, softened
1 1/2 cups sugar
2pcs eggs
1 tsp vanilla
2 tsp red food coloring
1/2 cup powdered sugar

Instructions
  • Place flour, cocoa powder, baking powder, and salt into a medium mixing bowl.
  • Mix butter, and cream cheese in a large mixing bowl. Add sugar and cream for about 1 to 2 minutes. Add eggs, red food coloring, and vanilla. Mix well.
  • Add dry mixture in two batches and mix well.
  • Refrigerate cookie dough for 4 hours.
  • Heat oven to 175C.
  • Scoop about 1 tsp of mixture and roll into balls. Roll it in powdered sugar, making sure to cover everything.
  • Bake for around 9 to 10 minutes.
Makes approx. 30 cookies
Recipe adapted from thelittlekitchen.

Cream Cheese frosting
Ingredients
4 oz cream cheese, softened
1/4 cup butter, softened
1 tsp vanilla extract
3 cup powdered sugar

Instructions
  • Cream together room temperature cream cheese and butter.
  • Add in vanilla. Stir until no more streaks of vanilla are seen.
  • Add powdered sugar one cup at a time, making sure to mix it in completely before adding the next cup.

You know about my red velvet addiction, right? Well, if not, check out my other red velvet recipes:

Red Velvet Cupcakes
Red Velvet Cake 
Red Velvet Mousse Cake

Wednesday, September 16, 2015

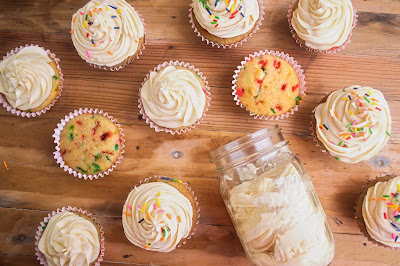
Funfetti Cupcakes | Vanilla Buttercream Recipe

It all started with a boxed cake mix.


WAIT! Before you close this window after reading the seemingly-banned-words ("boxed cake mix") in food/baking blogs, let me explain myself: yes, it did start with that, but it was because I saw them on sale! I rarely see cake mixes on sale - especially for more than half the price - so I took a box without even thinking of what to make.

Going back... I have been wanting to make a post about Vanilla Buttercream (or simple buttercream) for quite some time now. Since Vanilla Buttercream is very versatile, it was pretty hard to choose just one dessert to use it on. It could be used on any flavor of cakes and cupcakes - even on cookies! But I recently saw this tutorial by Zoella, and it reminded me of how much I want to make Funfetti cupcakes! Although she shared her own recipe, I already had my favorite vanilla buttercream so I didn't try her version. Sorry, Zoe. :( But I still love you <3


Recalling that I have a recently purchased boxed cake mix, I focused on the buttercream. Not having an electric mixer makes me feel lazy to make one... Let's just say my arm muscles get mad at me after whipping up just one batch of this. But I can't help it - buttercream still rules! So I end up whipping this while watching TV to distract myself from the soreness. LOL. Not having a mixer means making an extra effort to incorporate that sugar with butter. But I am a living proof that it could be done! :)

I have this thing for quick and easy - and these cupcakes are exactly that even without a boxed cake mix. Simply make a vanilla cupcake*, mix in sprinkles before baking, whip up vanilla buttercream, then add more sprinkles! But since sprinkles make anything better, I added a half cup of it into the batter even if it already had sprinkles pre-mixed in it. Or maybe I added another cup more... :>


I love how easy it is to pipe, and that it holds its shape very well. I was able to serve 80 vanilla frosted cupcakes in a party, and it all retained its shape after 5 hours!

This simple buttercream is fluffy, easy to whip (well, if you have a mixer!), and can be paired with almost anything! It can be served on any occasion as well.


And speaking of occasion ~ after I made these cupcakes, I remembered that my goddaughter's birthday was coming up. These then became the perfect celebration cupcakes/gift! Does this make me a good godparent despite my forgetfulness? I think it does. BUTTERCREAM RULES.
*As for my version of vanilla cupcakes, I'm still experimenting on getting that perfect cupcake, so please stay tuned for that! ;)


Vanilla Buttercream
Yield: Frosts around 30 cupcakes, or crumb coats an 8"-9" cake with two layers
Ingredients
  • 1 cup Butter (softened)
  • 7 cups Powdered Sugar
  • 1 tbsp Vanilla
  • 6 tbsp Milk (approximate)
  • pinch of salt
Directions
  1. Cream room temperature butter in a large bowl.
  2. Mix in vanilla and salt.
  3. Add in powdered sugar one cup at a time. Keep on mixing until sugar is dissolved. Add a tbsp of milk (or water) whenever mixture becomes hard to mix.
  4. Mix to desired consistency.
Recipe adapted from iambaker.

Just a warning: this is sweet. Very sweet. You could decrease the powdered sugar by a cup or two, but make sure to taste it because the butter might become dominant. Also, it might become too soft that it won't hold its shape. 

Monday, August 10, 2015

Sunflower Cupcakes | Chocolate Cupcake Recipe

I finished college!


So I know that that is a weird intro for a tutorial about Sunflower Cupcakes. What would have been better was "It's still summer!" or "Here's something to brighten up your mornings - ". Well, I could have said that but I really made these as my graduation cupcakes :)


If you have read the "about me" page of this blog, you know that I am studying at the University of the Philippines. UP has this tradition of planting sunflowers during summer season (which is March-May for the Philippines), which symbolizes our graduation (I think it's a very pretty tradition, but don't ask me why because I can't answer that). This year is different, because they started planting around May, since we had our academic calendar shift. What used to be an April graduation moved to June.

Since March, I was already thinking of how to make these cupcakes. My biggest dilemma was the flavor of the base cupcakes. Then I thought, why not make simple, flavorful chocolate cupcakes? Yeahhh, that sounds nice. It would be a nice contrast to the bright yellow frosting!


Chocolate Cupcake

Prep time: 10 mins
Cook time: 20 mins
Total time: 30 mins
Yield: Approx. 15 cupcakes
Ingredients:
  • 1 1/3 cups Flour
  • 1/4 tsp Baking Soda
  • 2 tsps Baking Powder
  • 3/4 cup Cocoa Powder
  • 1/8 tsp Salt
  • 1/4 cup Butter (softened)
  • 1 1/2 cups Sugar
  • 2 Eggs
  • 3/4 tsp Vanilla Extract
  • 1 cup Milk
Cooking Directions
  1. Preheat oven to 175C. Line cupcake pan.
  2. Sift together the flour, baking powder, baking soda, cocoa, and salt. Set aside.
  3. In a large bowl, cream together the butter and sugar until light and fluffy. Add the eggs one at a time. Stir in vanilla.
  4. Add the flour mixture alternatively with milk.
  5. Spoon 1.5 tbsps of the mixture into each cupcake liner. Bake for 15 to 20 minutes in the preheated oven.
Recipe adapted from WikiHow - sorry can't find the link anymore :(


For the Sunflower effect, I used the Wilton tip #70 which is a grass tip.
Simply pipe the petals as you would on a normal leaf. Start from the outside circle at a 160 angle (slightly angled), working your way to the inside. Make sure not to pipe it too long that it'll drop at the sides, and don't apply too much pressure. Once you've almost covered the whole thing (the center should still be a little bare), sprinkle some chocolate chips on it. Make sure the chips are on the inner circle only.

Even though my graduation was 2 months ago, I'm still posting this because it's still summer in other parts of the world! Take Canada, for example, where my cousin (Hi Colleen!) lives. Luckily, she was able to come home here during my graduation because it was her summer vacation! She also helped me in designing these cupcakes ;)

I hope these cupcakes will brighten your day no matter what the weather or the occasion is! <3

Monday, June 15, 2015

Oreo Cheesecake Recipe

Let's be honest here: who doesn't like Oreo?


Actually, don't answer. That's rhetorical because a normal person loves them!

Now Cheesecake, on the other hand, may be quite sketchy. Some don't like it because of its sourness and the unconventional taste compared to your normal moist chocolate cake. I actually wasn't familiar with cheesecake until around late High School. It's pretty expensive so I didn't get to taste it on a regular basis back then. But when I started baking, my love for cheesecake developed. It's a diversion from my usual sweet desserts, yet it fulfills my dessert cravings.

But a little sweetness would not hurt. So why not combine this classic cheesecake with Oreos? And to make things more exciting, I added whipped cream. That tall swirl of whipped cream is another thing to look forward to!


This dessert may be sophisticated, but it's actually easy to make. The ingredients are also easy to find! There are versions of cheesecakes that use sour cream, but this one does not.

Ingredients
1 package (24 cookies) Oreo cookies (divided), plus more for garnishing
1/4 cup butter (melted)
24oz (3 packages) cream cheese
3/4 cup sugar
1 tsp vanilla
3 eggs
1 to 1 1/2 cups heavy whipping cream

Instructions

  1. Preheat oven to 175C.
  2. Place 16 whole Oreo cookies (includes the cookie filling) in a food processor. Pulse until the cookies are in fine crumbs. If you don't have a food processor, place the cookies in a resealable bag and use a rolling pin or glass bottle to crush the cookies into fine crumbs.
  3. Mix melted butter into the finely crushed cookies. Once it is thoroughly mixed together, press the mixture firmly on the bottom of a springform pan using a spoon or your hands.
  4. Beat cream cheese until smooth. Add in sugar and vanilla. When the mixture is well blended, beat in eggs one at a time. 
  5. Chop the remaining 8 Oreo cookies. This does not need to be neat, but do not overdo it. Fold it in the batter. You may add more cookies if you desire.
  6. Pour the batter on the prepared crust. Bake for 45 minutes. After baking, open the oven door by a little bit and let the cake cool inside for around 30 minutes. Afterwards, refrigerate for 3 hours or overnight.
  7. Prepare whipping cream by whipping it for around 5 minutes, or until it has doubled in quantity. Garnish according to how you want your cake to look like.
Makes one 9" cake.
Recipe adapted from allrecipes.


Play around with the flavor of Oreo cookies you'll use. I used strawberry filling for garnishing the cake. Why not try to use the Birthday Oreos next time? Or even mint Oreos! The possibilities are endless. ;)

Saturday, May 23, 2015

Red Velvet Mousse Cake Recipe

Have I told you about my addiction to red velvet?


Lately, I have been dreaming of making more challenging cakes. It's not that making perfect cake layers and smooth & even frosting isn't hard, but I just want to try something a little bit out of the usual. I recalled a chocolate mousse cake. Who can ever forget that rich chocolate cake layered with smooth chocolate mousse and light whipped cream?  But my addiction for making everything red velvet kicked in - so why not make a red velvet mousse cake?


This cake is composed of a red velvet cake bottom, red velvet mousse for the center, and whipped cream for the top layer. The varying texture per layer makes magic in your mouth. This takes more time to prepare, but it. isworth it. The extra labor makes it more challenging yet more special! Go creative in adding the whipped cream: you could either pipe in the frosting like I did, or simply pour it evenly on the cake. Garnish with chocolate chips, grated chocolate, or even red sprinkles! This part is totally up to you.


(Red Velvet Cake assembly)
For the base cake, I halved this red velvet cake recipe and used an 8 inch springform pan. While the cake is in the oven, prepare the red velvet mousse (instructions below). When the cake is done, remove it from the pan and let it cool in a cooling rack. After 10 minutes or so, return the cake on the same pan, and then pour the red velvet mousse over it. This ensures that the circumference of the mousse is even and won't spill over the sides of the bottom layer.

After assembling these two layers, place it in the fridge for an hour to make sure that the mousse is set. Before removing the cake from the fridge, prepare the whipped cream. The amount of whipped cream depends on you, but I like to use 1 to 1.5 cups of heavy whipping cream. You can't have too much whipped cream anyway, right? Using an electric mixer (or a really strong arm), whip the cream for around 5 minutes, until stiff peaks form and it has doubled in volume.

Push the bottom part of the springform pan to remove the cake and prepare it for frosting. Pipe the frosting the way you desire. If you opt to spread the whip cream instead, I suggest to do this before removing the cake from the springform pan.

Garnish with your favorite topping: may it be chocolate chips, red sprinkles, chocolate sprinkles, grated chocolate, or more!

Ingredients (Red Velvet Mousse)
2 oz. bittersweet chocolate, chopped
1 1/8 cups heavy whipping cream, divided
1/2 tbsp red food coloring
1/2 tbsp vanilla
1/8 cup granulated sugar*

Instructions (Red Velvet Mousse) 

  1. Melt the chocolate on a double broiler or on the microwave. Make sure to watch over this and not let it scorch! Stir it to ensure that there are no more lumps and that it is smooth.
  2. Remove from heat, then add in 1/8 of the heavy cream and stir until it is smooth.
  3. Add red food color and vanilla. Let it stand for around 10 minutes to cool it slightly.
  4. While letting it cool, whip the remaining cup of cream and sugar in another bowl until stiff peaks form.
  5. Fold in half of the chocolate mixture to the cream. Add the remaining chocolate mixture afterwards.
  6. See the instructions above on how to assemble into a red velvet mousse cake.
Makes one 8" layer (enough for one red velvet mousse cake)
Recipe adapted from iambaker.

Notes and Tips for Success:
* The amount of sugar depends on you. If your whipping cream needs some sweetening, add according to your preference. The brand I used was sweet on its own, so I didn't bother to add sugar.
* Double the recipe if you plan to make small batches (aside from the cake) to be put in small container cups or jars (just like the photo below!)
* Make sure to use Springform pan to ensure that the layers are clean on the sides.


NO REGRETS. This is my most favorite cake (so far)! The only problem here is that it can't be left for long on room temperature. That is, if there will be slices left after you serve it. I know mine didn't. *smirks* But this is a challenge when transferring it to other places or giving away as gift. But there's a solution here: put it in a mason jar! Simply mash the left-over cake (the scraps after leveling the bottom layer), pack it at the bottom of the jar, layer with red velvet mousse, pipe whipped cream, and garnish. I also placed it on small container cups, but it was long gone before I took photos.


Sunday, May 10, 2015

Cinnamon French Toast Sticks Recipe

Breakfast is definitely my favorite meal of the day!


I absolutely believe that it's the most important meal of the day. Plus, breakfast meals are my favorite - pancakes, bacon, french toast - name it! I also love how creative you could be with it. So making your breakfast pretty AND delicious = baking a delicious cake and decorating it (which is my favorite part of making a cake)!

I've been the one who introduced French Toast to my family when I stumbled upon a recipe from an all-purpose cream carton. I was able to perfect it once or twice, but I wasn't able to keep the recipe. And whenever I'm going to recreate it, I keep on forgetting the ingredients and its proportions. But recently, I've been pinning different French Toast ideas on Pinterest. So seeing that there was stale bread available at home, I immediately thought of this.

Ingredients:
6 slices of bread (preferably stale)
2 eggs
1/2 cup milk
1 1/4 tsp cinnamon
1/2 tbsp sugar
1/2 tbsp vanilla
For cooking: butter or margarine
For serving: Maple syrup (or any choice of dip)

Instructions:
  1. Cut each bread into 4 slices. Set aside.
  2. In a bowl, whisk together eggs, milk, cinnamon, sugar, and vanilla.
  3. Heat a non-stick pan over low-medium heat. Melt butter or margarine on the pan.
  4. After step 3, immediately coat bread slices with the batter, shake off excess, and place immediately on the pan to avoid the butter from burning. Cook a single layer of coated bread sticks that can fit in your pan, but do not overcrowd it.
  5. Cook until one side is golden brown. Flip the bread, and achieve the same golden brown color on all sides.
  6. Repeat steps 3 to 5 until all bread sticks are cooked.
  7. Serve immediately with your syrup or dip of choice.
Recipe from Just a Taste.


Don't limit yourself to eating French Toast for breakfast only - you can make these for snacks!

Thursday, April 30, 2015

Quadruple (Moist) Chocolate Cake Recipe

It all started with a cupcake.


Early last week, I made Chocolate cupcakes with Strawberry frosting for my good friend's graduation gift to her college friends (congratulations, KC!). I tried out a moist cupcake recipe, thinking that I never made any moist cake or cupcake despite the fact that it says so in the title of the recipe. I don't know - maybe there's something wrong with my execution or ingredients. But then, this turned to be dense and moist! The chocolate was so rich, that I think I could convert it into a cake and finally make a perfectly moist chocolate cake!

 
For the whole week, I was thinking about how I would make and design my cake. I was dreaming about it in class despite the fact that I was finishing a report and trying to listen attentively to a very perplexing discussion of a novel that week. I was thinking of making 3 layers, using chocolate ganache (which I rarely make) over chocolate buttercream, and topping it with curled chocolate. Oh, how time consuming that is! Yet, I'm looking forward to it.

I was thinking of doubling the recipe to make the cake high. But realizing that my supplies are not yet replenished, I ended up making one and a half batch of the recipe (same measurements written below). I might have made the wrong decision of using a 9" pan, because it yielded only 2 (tall) layers. But I wasn't disappointed with it because it still came out pretty tall.


I told you earlier that I was supposed to use chocolate curls. Turns out I'm too lazy to make those at that time! I scavenged through my refrigerator to look for an alternative, when I stumbled upon a container of two-tone peppermint chocolate bark which I made before. It was perfect! Someone had suggested to use chocolate bark and stick it on my cake like shattered glass. Hey, that idea made my cake look so much fancier! ;)

This cake made my week. My taste testers will usually comment on how grainy and sweet my frosting is and/or how my cake is not that moist, but this one gathered nothing but praises! The summary of their comments was "perfect" and "beautiful cake", and how much I have improved over a year of practice. This keeps me motivated <3

Ingredients
3 3/8 cups flour
3 cups sugar
1 1/2 cups cocoa
3 tsp baking soda
3/4 tsp salt
1 1/2 tbsp vanilla
1 cup oil
3 tsp vinegar
1 1/2 cup coffee
1 1/2 cup hot water

Instructions
  1. Preheat oven to 175C degrees.
  2. In a large bowl, sift together flour, sugar, cocoa, baking soda, and salt. Whisk together, then set aside.
  3. In a medium bowl, mix together the vanilla, oil, vinegar, coffee, and hot water
  4. Add the wet mixture to the dry ingredients.
  5. Pour batter to cake pan. Bake for 25-30 minutes.
  6. Place in a wire rack to cool for around 10 minutes before leveling cake.   
Makes 2 (tall) layers of 9" cake, or 3 layers of 8" cake
Recipe adapted from iambaker.


Notes and Tips for success:
* This cake won't taste like coffee. It simply accentuates the (chocolate) flavor.
* Use 8" pan for taller layers.

A simple chocolate ganache complements this moist cake! No need to go the extra mile like I did if you have little time :)
I hope you'll get the same praises when you make this cake, too! ;)

Sunday, April 12, 2015

Peanut Butter Oatmeal Cookies Recipe

Weeks ago, my aunt gave me a bag of oats and forced asked me to bake something out of it. I immediately thought of making cookies, but I didn't settle easily on what recipe to try. It's like I was waiting for the perfect recipe to show up on my pin board. Then a few days ago, I recalled that I have a jar of peanut butter lying around the cupboard waiting to be used. I searched for a recipe where I can utilize both ingredients... and I'm glad I did!


They liked it SO MUCH because it's similar to the expensive cookies at coffee shops! Who would believe that there's only 7 ingredients in it? And if you'll scroll through my posts, you'll notice that I have a sweet tooth (I'm talking to you, KitKat Cake). This recipe is an exception. I honestly got surprised at first because it's just slightly less sweet than a normal cookie, yet there's only 6 tbsp of sugar in it! You would totally get fooled that there's a cup of sugar in it.


Look at that photo. At first, you wouldn't think there's oatmeal in it. Now look closer. Closer. Yes, zoom it in more. Would you believe that there's no flour in it? YES, it's a gluten-free cookie! Now I don't know about eating healthy (yet), but knowing that it's gluten-free yet tastes like a regular cookie makes the next bite guilt free.


Even the raw batter looks delicious! It looks like toffee candy, right? Don't be tempted to eat it raw, though. Keep in mind that it contains raw egg.

You know what seals the deal? It's a one bowl recipe!

Ingredients
1 pc. large egg
1 cup peanut butter* (room temperature) 
6 tbsp light brown sugar (packed)
2/3 cup oats (I used quick cooking oats)
1/2 tsp cinnamon
1 tsp baking soda
1/2 cup chocolate chips

Instructions
  1. In a medium bowl, beat the egg.
  2. Fold in the peanut butter and brown sugar.
  3. Add the oats, cinnamon, and baking soda. Still using a rubber spatula, mix slowly until everything is combined.
  4. Fold in the chocolate chips.
  5. Chill the cookie dough for 30 minutes.
  6. Preheat oven to 175C degrees. Line a baking sheet with silicone mats or parchment paper (both yields the same results).
  7. Scoop 1/2 - 3/4 tablespoon of dough, and drop into the baking sheet. You may opt to roll it a little bit before placing on the sheet, but keep in mind that the dough might be crumbly. If so, slightly squeeze it to avoid pieces from falling off.
  8. Gently press down the balls using the back of a spoon to flatten it a little bit. 
  9. Bake for 10 minutes. 
  10. Allow the cookies to cool for 5 - 10 minutes on baking sheet before transferring to a cooling rack.
Makes approx. 30 cookies (depends on Step 7)

Recipe adapted from Sally's Baking Addiction.


Tips for success:
* I used chunky peanut butter. The peanuts actually lessens the (already slight) sweetness of the cookie and adds more flavor to it. If you don't like peanuts, use creamy peanut butter.
* Use room temperature peanut butter. You might find it hard to mix in the dry ingredients if it was refrigerated.
* Be gentle when flattening the cookie dough. It might just stick on the spoon if there's too much pressure.
* If the cookie dough is too oily (because of the type of PB you used), blot the flattened cookie dough with a paper towel before placing in the oven.
* Do not skip step 10! The cookies are still baking after removing it from the oven. Removing it immediately makes the cookie crumble.


Saturday, April 4, 2015

Easter Cake | Yellow Cake Recipe

Living in a Catholic country, Holy Week is keenly observed. Palm Sunday, Visita Iglesia, Station of the Cross, lighting candles for parades (statues of saints parading in our town), and many more are practiced. The most joyful part, however, is the resurrection of Christ, which is celebrated through Easter.


The way I see it through the internet and foreign TV shows (such reliable sources, eh?), Easter Sunday is celebrated in other countries through Easter egg hunting and is represented by the Easter bunny. While there are some private subdivisions and malls who hold that activity, it's not that famous in my country. I didn't even know what the Easter bunny was until I was around 12! What my family does is to go to mass, then hold our annual family reunion.


Now that I know how to bake, our reunion is sweeter. Our celebration is just fine the way it is, but I get a lil' bit envy with all the pastel colors and treats in other countries on the same occasion. So here, I decided to make a simple yellow cake with lots of pastel colors in it.


Okay, the decorations on the top was supposed to be pastel colored, too. I had these star-shaped sprinkles (or jimmies, as others say it), but I spared it because I plan to use it on other things (needless to say that I felt like I made the wrong decision of sparing those because I could have just bought a new bag on my next cake/cupcake idea). Either way, I feel like it still turned out pretty because of all the lively colors! The yellow cake was a perfect neutralizer for all those colors. And admit it - we all need a basic cake recipe for those time when we want to concentrate on the cake's design. ;) The pastel polka dots is inspired by iambaker's obsession with polka dots. ;)

Ingredients
1/2 cup oil
4 egg yolks
3/4 cup water
1 1/2 tsp vanilla
2 cups flour
1 1/2 cups sugar
2 1/2 tsp baking powder
1 tsp salt
4 egg whites
1/2 tsp cream of tartar

Instructions

  1. Preheat oven to 175C.
  2. Mix together oil, egg yolks, water, and vanilla in a large mixing bowl. Set aside.
  3. Sift together flour, sugar, baking powder, and salt. Add slowly into wet ingredients, and beat until smooth batter forms.
  4. In a small mixing bowl, beat egg whites and cream of tartar using an electric mixer. Beat until egg whites are stiff. (You can still achieve this even without a mixer; just be patient with beating the egg whites). Fold the stiff egg whites into the batter.  
  5. Pour the cake batter into a cake pan. Bake for 30 minutes. Cool the cake layers before frosting. 
Makes 2 layers of 8" cake.

Recipe adapted from WikiHow.


To achieve the pastel polka-dots, I took two spoonfuls of plain buttercream, placed it on a separate bowl, and added 1 small drop of food coloring. Remember to add one drop at a time and to stir it before adding another drop because we are making pastel colored frosting here. If you made the mistake of adding too much color, add more plain buttercream to lighten it. The colors I chose were pink (but I used a red food coloring), blue, and green. Put it in separate piping bags (or make sure to clean it before adding a new colored frosting), and cut a very small hole on the tip to achieve small dots. To make the dots a little bit bigger, add a little bit more pressure on the bag.

Now that you have a recipe for a simple and easy yellow cake, start getting creative on your cake designs! ;)

Sunday, March 29, 2015

Red Velvet Cake Recipe

I am not yet over with Valentines Red Velvet. And for some reason, my family and friends aren't over it, too!

Next to Chocolate or Devil's Food Cake, the most loved cake in the house is Red Velvet Cake. After lots of attempt in achieving a perfect red tint and moist red velvet cupcakes, I was hesitant at first to try a cake version. But I started to crave for Red Velvet cake whenever I look at it on bake shop displays! I know I could make one for myself, so I made an attempt.


And it was absolutely worth it.


To make red velvet cake, you don't simply put red food coloring on a white cake. No. There must be that slight chocolate aftertaste to it, there must be a slight sourness contradicting blending with the sweet ingredients, and the texture of the crumbs must reflect that of velvet. Hence, the name Red "Velvet". 


Ingredients
2 1/2 cups flour
1/2 tsp salt
2 tbsp cocoa powder
1/2 cup butter (softened)
1 1/2 cups sugar
2 pcs. eggs
1 tsp vanilla
1 cup buttermilk
2 tbsp (one 20mL bottle) red food coloring
1 tsp vinegar
1 tsp baking soda

Instructions

  1. Preheat oven to 175C.
  2. Sift together flour, salt, and cocoa
  3. In a separate bowl, beat butter until creamy. Add the sugar and make sure to mix it until it is light and fluffy. Then, add eggs one at a time. Add vanilla.
  4. In a small bowl, whisk buttermilk with red food coloring.
  5. Alternately add flour and buttermilk mixture to butter mixture.
  6. In a small cup, combine vinegar and baking soda. Allow to fizz before folding into batter.
  7. Bake for 25-30 minutes. 
Makes 2 layers of 9" cake.

Recipe from Joy of Baking.


Although you can frost this cake with any type of frosting, I still recommend Cream Cheese frosting. It's not a complete red velvet cake without the cream cheese!